Introduction
In the realm of modern web applications, optimizing static assets is essential for achieving superior performance, an enhanced user experience, and robust scalability. Phoenix, a powerful web framework built with Elixir, provides a solid foundation for developing high-performance web applications. However, the way static assets—such as CSS, JavaScript, images, and fonts—are handled can significantly impact the overall efficiency and responsiveness of your app.
Optimizing these assets is not just about reducing load times; it also plays a pivotal role in improving your application's scalability. Efficient management of static assets ensures that your server resources are used judiciously, allowing your Phoenix application to handle more concurrent users without degrading performance. Furthermore, a finely-tuned asset pipeline can enhance user satisfaction by delivering faster load times, thereby reducing bounce rates and increasing engagement.
In this guide, we will explore a comprehensive set of strategies and best practices to optimize static assets in Phoenix applications. We'll delve into various techniques and tools to ensure that your static resources are served efficiently and effectively. Here’s an overview of what you can expect:
-
Understanding Static Assets in Phoenix:
- Learn what static assets entail and how Phoenix handles them by default.
-
Compiling and Minifying Assets:
- Discover how to use tools like Brunch or Webpack for compiling and minifying your CSS and JS files to reduce load times and improve performance.
-
Leveraging Browser Caching:
- Understand how to configure caching headers in Phoenix to maximize the benefits of browser caching for static assets.
-
Using a Content Delivery Network (CDN):
- Learn how to set up and configure a CDN to serve static assets, reducing latency and improving content delivery speeds.
-
Image Optimization Techniques:
- Explore various methods and tools to optimize images, including formats, compression techniques, and responsive design strategies.
-
Serving Compressed Files:
- Get insights into serving gzip or Brotli compressed files in Phoenix to minimize transfer sizes of static assets.
-
Tips for Efficient Asset Management:
- Gain additional tips for organizing and managing assets efficiently, conducting audits, and leveraging automated build tools.
-
Monitoring Performance with Load Testing:
- Learn how to use LoadForge to perform load testing on Phoenix applications, ensuring your optimizations hold up under high-traffic conditions.
By the end of this guide, you'll have a comprehensive understanding of how to optimize static assets in your Phoenix applications, resulting in faster load times, better user experiences, and scalable architectures. Let's embark on this journey to perfect your Phoenix application's performance!
Understanding Static Assets in Phoenix
In the context of Phoenix applications, static assets refer to the files that are served directly to the client without requiring any server-side processing. These assets typically include CSS, JavaScript, images, and fonts. Properly managing these static assets is crucial for delivering a swift and seamless user experience.
What Are Static Assets?
Here's a brief breakdown of common static assets in a Phoenix application:
- CSS (Cascading Style Sheets): Defines the look and feel of your web application, including layouts, colors, fonts, and other visual elements.
- JavaScript: Adds interactivity and dynamic behavior to your web application, from basic form validation to complex single-page applications (SPAs).
- Images: Visual elements like logos, background images, icons, and other graphics that enhance the visual appeal of your application.
- Fonts: Custom typefaces that improve the readability and aesthetics of your text content.
Default Handling of Static Assets in Phoenix
Phoenix uses a straightforward approach to manage static assets. By default, these assets are stored in the priv/static directory and served directly to the client. The Plug.Static plug in Phoenix serves files from the priv/static directory efficiently.
Example Folder Structure
priv
└── static
    ├── css
    │   └── app.css
    ├── js
    │   └── app.js
    ├── images
    │   └── logo.png
    └── fonts
        └── custom-font.woff
In a newly generated Phoenix project, you will find the most basic static assets setup. But for production, you'll likely need a more complex setup to handle compiling, minification, and other optimizations.
The Plug.Static Plug
The Plug.Static plug serves as the middleware responsible for serving static files. By default, it's typically included in the endpoint configuration of a Phoenix app.
Here's a snippet from the Endpoint module:
defmodule MyAppWeb.Endpoint do
  use Phoenix.Endpoint, otp_app: :my_app

  # Serve at "/" the static files from "priv/static" directory.
  plug Plug.Static,
    at: "/",
    from: :my_app,
    gzip: false,
    only: ~w(css fonts images js favicon.ico robots.txt)

  # Other plugs...
end
Summary
In this section, we've defined what static assets entail within Phoenix applications—covering CSS, JavaScript, images, and fonts. We've also touched upon how Phoenix handles these assets out of the box using the priv/static directory and the Plug.Static plug. In subsequent sections, we’ll delve into various techniques for optimizing these static assets, including compilation, minification, caching strategies, and more. This foundation will help you better understand the subsequent optimizations we’ll discuss to enhance the performance, scalability, and user experience of your Phoenix applications.
Compiling and Minifying Assets
Optimizing your static assets by compiling and minifying them is a crucial step in improving the performance of your Phoenix application. This not only reduces the size of your CSS and JavaScript files, leading to faster load times, but also helps in organizing and managing your assets more efficiently. In this section, we'll guide you through the process using tools like Brunch and Webpack.
Using Brunch with Phoenix
By default, Phoenix projects come configured with Brunch, a lightweight build tool. Here’s how you can leverage Brunch to compile and minify your CSS and JavaScript files:
- Ensure Dependencies are Installed:
Make sure you have Node.js and npm installed. You can verify this by running:
node -v
npm -v
- Update Brunch Configurations:
The Brunch configuration file,
brunch-config.js, is located in the root of your Phoenix project. To enable minification, you need to set up production-specific settings:
exports.config = {
files: {
javascripts: {
joinTo: "js/app.js"
},
stylesheets: {
joinTo: "css/app.css"
}
},
plugins: {
babel: {
presets: ["@babel/preset-env"]
},
terser: {
ecma: 6,
compress: {
global_defs: {
DEBUG: false
}
}
},
cssnano: {
preset: 'default'
}
}
};
The terser plugin is used for JavaScript minification, and cssnano is used for CSS minification.
- Build for Production:
Run the following command to compile and minify your assets for production:
npm run deploy
This will generate minified versions of your CSS and JavaScript files in the priv/static directory.
Using Webpack with Phoenix
While Brunch is the default, using Webpack can provide more flexibility and features. Here's how you can set up Webpack in a Phoenix project:
-
Install Webpack and Dependencies:
Install Webpack along with necessary plugins:
npm install --save-dev webpack webpack-cli babel-loader @babel/core @babel/preset-env css-loader style-loader terser-webpack-plugin css-minimizer-webpack-plugin
-
Configure Webpack:
Create a webpack.config.js file in your project root:
const TerserPlugin = require('terser-webpack-plugin');
const CssMinimizerPlugin = require('css-minimizer-webpack-plugin');
module.exports = {
mode: 'production',
entry: './assets/js/app.js',
output: {
filename: 'js/app.js',
path: __dirname + '/priv/static'
},
module: {
rules: [
{
test: /.js$/,
exclude: /node_modules/,
use: {
loader: 'babel-loader',
options: {
presets: ['@babel/preset-env']
}
}
},
{
test: /.css$/,
use: [
'style-loader',
'css-loader'
]
}
]
},
optimization: {
minimize: true,
minimizer: [
new TerserPlugin(),
new CssMinimizerPlugin()
]
}
};
This configuration sets up Webpack for handling JavaScript and CSS files, enabling minification through TerserPlugin and CssMinimizerPlugin.
- Build for Production:
Run the Webpack build command:
npx webpack --config webpack.config.js
Your minified assets will be generated and stored in the priv/static directory.
Benefits of Minification
Minification is the process of removing unnecessary characters (like whitespace, comments, and line breaks) from the code without altering its functionality. Here are some key benefits:
- Reduced File Size: Minified files are significantly smaller in size, which leads to faster download times for your users.
- Improved Load Times: Smaller files load quicker, leading to better performance and user experience.
- Bandwidth Savings: Reduced file sizes also mean less bandwidth usage, which can lower hosting costs.
By compiling and minifying your static assets, you can ensure that your Phoenix application runs more efficiently, providing a smoother experience for your users. In the next sections, we'll explore additional techniques to optimize your static assets further.
Leveraging Browser Caching
Browser caching is a powerful technique to enhance the performance of your Phoenix application by storing static assets locally on users' devices. By configuring your app to utilize browser caching efficiently, you can significantly reduce load times, decrease server load, and improve the overall user experience. This section explores the concept of browser caching and how to configure caching headers in Phoenix to ensure static assets are cached effectively.
Understanding Browser Caching
When a user visits your application, the browser fetches all necessary resources such as CSS, JavaScript, images, and fonts. Each time the user navigates to a new page, the browser may need to download these assets again, leading to unnecessary delays and increased server load. Browser caching allows the browser to store these resources locally after the first download, so subsequent visits are much faster as the assets are retrieved from the local cache rather than the server.
Configuring Caching Headers in Phoenix
To make use of browser caching, you need to instruct browsers on how long they should cache a particular resource. This is done by setting caching headers in your Phoenix application. Phoenix relies on plug.Static to serve static assets, and you can configure cache headers through this module.
Here’s how you can configure plug.Static for efficient browser caching:
-
Open your Phoenix application's endpoint file, usually found at lib/my_app_web/endpoint.ex.
-
Locate the plug.Static configuration.
-
Modify the cache_control_for_etags and cache_control_for_vsn_requests attributes to specify the caching duration.
Here is an example configuration to cache static assets for one year:
defmodule MyAppWeb.Endpoint do
  use Phoenix.Endpoint, otp_app: :my_app

  plug Plug.Static,
    at: "/",
    from: :my_app,
    gzip: false,
    cache_control_for_etags: "public, max-age=31536000",
    cache_control_for_vsn_requests: "public, max-age=31536000"

  # Other plugs and endpoint configurations
end
Explanation of Key Attributes
cache_control_for_etags: Applies cache control headers to files that have an ETag, which helps in validating if a cached resource has changed.cache_control_for_vsn_requests: Applies to versioned requests (usually with ?vsn=XYZ parameter) and helps in controlling the cache lifetime.
Testing and Validation
After configuring the cache headers, it’s essential to ensure they work as expected. You can use browser developer tools to inspect the HTTP headers returned with your static assets. Here’s how you can do it in popular browsers:
-
Open Developer Tools: Right-click on your application page and select "Inspect" or press Ctrl+Shift+I/Cmd+Opt+I.
-
Go to Network Tab: Navigate to the "Network" tab.
-
Reload the Page: Refresh the page and look for static asset requests.
-
Inspect Headers: Click on individual assets and look for the Cache-Control header under the "Headers" section.
The Cache-Control header should reflect your configuration, indicating that the resources will be cached for the specified duration.
Benefits of Browser Caching
By leveraging browser caching, you can:
- Reduce Load Times: Cached assets are loaded from the browser's local storage, making page loads much faster.
- Decrease Server Load: Fewer requests are made to the server, leading to reduced server load and costs.
- Improve User Experience: Faster load times translate to a smoother and more pleasant experience for users.
In conclusion, effective use of browser caching can dramatically improve the performance and scalability of your Phoenix application. With the proper configuration, your static assets will load quickly, providing a better user experience and reducing the strain on your servers.
Using a Content Delivery Network (CDN)
Optimizing the performance of static assets in your Phoenix application can significantly enhance user experience and scalability. One of the most effective strategies for achieving this is using a Content Delivery Network (CDN). A CDN is a distributed network of servers that delivers content to users based on their geographic location, effectively reducing latency and improving load times. In this section, we will demonstrate how to set up and configure a CDN for serving static assets in Phoenix applications and discuss the various advantages of using a CDN.
Benefits of Using a CDN
Before diving into the setup, it's important to understand the benefits of integrating a CDN with your Phoenix application:
- Reduced Latency: By serving content from servers located closer to the user, CDNs significantly reduce the time it takes for assets to load.
- Improved Performance: CDNs offload traffic from your primary servers, leading to faster response times and improved overall application performance.
- Better Scalability: With CDNs handling a significant portion of asset delivery, your main servers can manage higher traffic loads more effectively.
- Enhanced Reliability: CDNs often offer built-in redundancy and failover mechanisms, ensuring content is always available, even during server outages.
Steps to Configure a CDN in Phoenix
Setting up a CDN requires modifying your application's configuration to ensure that static assets are served through the CDN. Below are the steps to achieve this:
1. Choose a CDN Provider
There are several CDN providers available, such as Cloudflare, Amazon CloudFront, and Fastly. For this guide, we'll use Amazon CloudFront as an example. The steps will be similar regardless of the provider you choose.
2. Configure the CDN
-
Sign Up and Create a Distribution:
- Sign up or log in to your chosen CDN provider.
- Create a new CDN distribution. For Amazon CloudFront, you would navigate to the CloudFront console and select "Create Distribution."
- In the create distribution wizard, specify the origin domain name, which should be your Phoenix application's domain or the S3 bucket if you're storing static assets there.
-
Configure Caching and Behavior Settings:
- Configure the caching behavior settings to ensure assets are cached for an appropriate duration. Typically, you can set the
Cache-Control headers in your Phoenix application to manage this.
- Set up custom error pages, logging, and other settings according to your requirements.
-
Get the CDN URL:
- Once the distribution is created, you'll receive a unique CDN URL. This is typically in the format
https://<distribution_id>.cloudfront.net.
3. Update Phoenix Configuration
You need to update your Phoenix application's configuration to use the CDN URL for serving static assets. Here's how you can do it:
-
Modify Endpoint Configuration:
- Open your Phoenix application’s endpoint configuration file, usually located at
config/prod.exs.
- Add or modify the
static_url configuration to point to your CDN URL.
config :my_app, MyAppWeb.Endpoint,
  url: [host: "example.com", port: 443],
  cache_static_manifest: "priv/static/cache_manifest.json",
  static_url: [scheme: "https", host: "<your_cdn_domain>", port: 443]
-
Asset Building:
- Ensure you’re building your assets correctly so that they correspond to the paths expected by your CDN. This might involve ensuring filenames include cache-busting hashes and other such practices.
Testing and Verifying CDN Integration
After configuring your Phoenix application to use the CDN, it’s crucial to verify that everything is working correctly:
-
Clear Browser Cache:
- Clear your browser cache to ensure you’re seeing the latest changes.
-
Inspect Network Requests:
- Open your browser's Developer Tools and navigate to the Network tab.
- Reload your application and inspect the requests being made for static assets. They should be served from the CDN URL.
-
Monitor Performance:
- Use tools like Google Lighthouse or webpagetest.org to analyze the performance improvements brought by using the CDN.
Conclusion
By integrating a CDN with your Phoenix application, you can leverage a powerful tool to reduce latency, improve performance, and ensure better scalability. This setup not only enhances the user experience but also takes a significant load off your primary servers, allowing them to handle more critical tasks efficiently.
In the following sections, we will explore additional techniques such as image optimization and serving compressed files to further optimize your Phoenix application.
Image Optimization Techniques
Optimizing images is crucial for enhancing load times, reducing bandwidth consumption, and improving the overall user experience in Phoenix applications. Here we explore various techniques and tools to optimize images, ensuring they are efficiently delivered to users.
Optimizing Image Formats
Choosing the right image format is the first step in optimizing images. Different formats are better suited for different types of images:
- JPEG is ideal for photographs or images with many colors and gradients.
- PNG is best for images with transparent backgrounds or high levels of detail.
- SVG (Scalable Vector Graphics) is optimal for icons and logos that require scalability without loss of quality.
- WebP offers superior compression and is supported by major browsers, providing a great balance between quality and file size.
By utilizing appropriate formats, you can significantly reduce file sizes without compromising quality.
Compression Tools
Image compression tools help reduce file sizes even further. There are two types of compression: lossy and lossless. Lossy compression reduces file size by eliminating some data, which might affect image quality, while lossless compression reduces size without any quality loss.
Here are some popular tools for both:
-
Imagemin: A powerful tool for compressing images via a range of plugins.
To use Imagemin with Phoenix, add Imagemin to your build process:
npm install imagemin imagemin-mozjpeg imagemin-pngquant imagemin-svgo --save-dev
Then, configure it in your asset build script:
const imagemin = require('imagemin');
const imageminMozjpeg = require('imagemin-mozjpeg');
const imageminPngquant = require('imagemin-pngquant');
const imageminSvgo = require('imagemin-svgo');
(async () => {
await imagemin(['static/images/*.{jpg,png,svg}'], {
destination: 'priv/static/images',
plugins: [
imageminMozjpeg({quality: 75}),
imageminPngquant({quality: [0.6, 0.8]}),
imageminSvgo()
]
});
})();
- Squoosh: An online tool that offers both lossy and lossless compression options.
- TinyPNG and TinyJPG: Lightweight web tools that make compressing PNGs and JPEGs straightforward.
Responsive Images
Delivering appropriately sized images based on the user's device can also lead to significant performance improvements. HTML5 introduced the srcset attribute, which allows you to define different image sources for various screen sizes and resolutions.
<img srcset="images/hero-small.jpg 500w,
             images/hero-medium.jpg 1000w,
             images/hero-large.jpg 2000w"
     sizes="(max-width: 600px) 500px,
            (max-width: 1200px) 1000px,
            2000px"
     src="images/hero-large.jpg"
     alt="Hero Image">
Image Lazy Loading
By default, browsers load all images on a page as soon as the page loads, which can slow down performance. Lazy loading defers the loading of off-screen images until the user scrolls near them.
With native lazy loading in HTML:
<img src="images/large-image.jpg" loading="lazy" alt="Lazy Loaded Image">
This simple attribute addition can boost your page load speeds significantly.
Automating Image Optimization
Integrating image optimization into your build process ensures that your images are always efficiently compressed and optimized. Using tools like webpack, you can automate the entire process.
For example, using the image-webpack-loader for Webpack:
npm install image-webpack-loader --save-dev
Add the loader to your Webpack configuration:
module.exports = {
  module: {
    rules: [
      {
        test: /\.(png|jpe?g|gif|svg)$/i,
        use: [
          {
            loader: 'file-loader',
          },
          {
            loader: 'image-webpack-loader',
            options: {
              mozjpeg: {
                progressive: true,
                quality: 75
              },
              optipng: {
                enabled: true,
              },
              pngquant: {
                quality: [0.65, 0.90],
                speed: 4
              },
              svgo: {
                plugins: [
                  { removeViewBox: false }
                ]
              }
            }
          },
        ],
      },
    ],
  },
};
By incorporating these practices and tools into your Phoenix application, you can ensure that images are optimized for both performance and quality, contributing to a faster, more responsive user experience.
Serving Compressed Files
When it comes to optimizing static assets for your Phoenix application, serving compressed files such as gzip or Brotli can significantly reduce the size of your assets during transfer, leading to quicker load times and a better overall user experience. In this section, we will explore how to enable and configure gzip and Brotli compression in your Phoenix application.
Benefits of Compressed Files
Compressed files provide several benefits:
- Reduced File Size: Compression can dramatically reduce the size of your CSS, JavaScript, HTML, and other static files.
- Faster Load Times: Smaller files mean faster downloads, which is particularly important for users on slower network connections.
- Lower Bandwidth Usage: Reduced file sizes also mean less bandwidth consumption, which can lead to cost savings.
Configuring Gzip Compression
Phoenix comes with built-in support for gzip compression. To enable gzip compression for your static assets, you need to update your endpoint.ex configuration file.
-
Update Endpoint Configuration:
Open your lib/my_app_web/endpoint.ex file and add :gzip to the Plug.Static configuration:
plug Plug.Static,
  at: "/",
  from: :my_app,
  gzip: true,
  only: ~w(css fonts images js favicon.ico robots.txt)
-
HTTP Server Configuration:
Ensure that your HTTP server is configured to serve compressed files. For example, if you are using Cowboy as your server, update your config/prod.exs:
config :my_app, MyAppWeb.Endpoint,
  http: [compress: true, port: 4000],
  ...
Configuring Brotli Compression
To serve Brotli-compressed files, you will need to use an external tool to pre-compress your static assets and then configure Phoenix to serve these files.
-
Install Brotli:
Depending on your environment, you can install Brotli using package managers such as Homebrew for macOS:
brew install brotli
-
Pre-compress Assets:
After installing Brotli, you can create a script to pre-compress your static assets. You can add this script as part of your build process:
find priv/static -type f -iname "*.js" -exec brotli --best {} \;
find priv/static -type f -iname "*.css" -exec brotli --best {} \;
find priv/static -type f -iname "*.html" -exec brotli --best {} \;
-
Update Endpoint Configuration:
Modify your endpoint configuration to serve Brotli-compressed files. You'll need to add a custom Plug to check for Brotli files and serve them if they exist:
defmodule MyAppWeb.BrotliPlug do
  import Plug.Conn

  def init(default), do: default

  def call(conn, _opts) do
    path = conn.request_path <> ".br"
    if File.exists?(path) do
      conn
      |> put_resp_header("content-encoding", "br")
      |> send_resp(200, File.read!(path))
      |> halt()
    else
      conn
    end
  end
end

plug MyAppWeb.BrotliPlug
Summary
By enabling gzip and Brotli compression, you can achieve significant performance improvements for your Phoenix applications. Gzip is straightforward to enable out-of-the-box with Phoenix while Brotli, which offers superior compression rates, may require additional steps for pre-compressing files. Both methods can substantially enhance user experience by reducing asset load times and conserving bandwidth usage.
Review these configurations periodically and monitor your application's performance using LoadForge to ensure that your optimizations remain effective under varying traffic conditions.
Tips for Efficient Asset Management
Efficient asset management is crucial for maintaining the performance and scalability of your Phoenix application. Below are some tips and best practices for managing static assets effectively to ensure your application remains optimized and maintainable.
Organizing Files
Properly organizing your static files helps keep your codebase clean and manageable. Here are some strategies:
- Segregate by Type: Store assets in directories based on their type (e.g.,
css, js, images, fonts). This makes it easier to locate and manage specific assets.
- Subdivide by Functionality: Within each type, organize assets by functionality or feature. For example, you can have separate directories for styles related to different components or features of your application.
- Consistent Naming Conventions: Use clear and consistent naming conventions for your files. This not only aids in identification but also helps in avoiding conflicts and duplicates.
Your directory structure might look something like this:
assets/
  css/
    main.css
    admin.css
  js/
    app.js
    utils.js
  images/
    logo.png
    favicon.ico
  fonts/
Performing Audits
Regularly auditing your static assets can help identify unnecessary files, outdated resources, and opportunities for optimization:
- Audit Tools: Use tools like WebPagetest or Lighthouse to analyze your web application's performance. These tools can provide insights into which assets are slowing down your load times.
- Manual Review: Periodically review your static files and remove unused or duplicate files. This helps reduce clutter and ensures only relevant resources are served to the user.
- Version Control: Keeping track of changes in your assets via version control (e.g., Git) allows you to manage and revert changes easily if needed.
Leveraging Automated Build Tools
Automated build tools streamline the process of managing, compiling, and optimizing static assets. Here are some popular tools and how they can assist:
- Webpack: A robust module bundler that can handle most of your asset management needs, including compiling, minifying, and versioning your CSS and JavaScript files. It integrates well with Phoenix.
// webpack.config.js
module.exports = {
  entry: './assets/js/app.js',
  output: {
    filename: 'bundle.js',
    path: __dirname + '/priv/static/js'
  },
  module: {
    rules: [
      {
        test: /\.css$/,
        use: ['style-loader', 'css-loader']
      },
      {
        test: /\.js$/,
        exclude: /node_modules/,
        use: {
          loader: 'babel-loader'
        }
      }
    ]
  }
};
- Brunch: The default asset manager for Phoenix, which can also be customized for tasks like minification and compilation.
// brunch-config.js
exports.files = {
  javascripts: {
    joinTo: 'js/app.js'
  },
  stylesheets: {
    joinTo: 'css/app.css'
  }
};

exports.plugins = {
  babel: {presets: ['@babel/preset-env']}
};
- Task Runners: Tools like Gulp and Grunt can automate repetitive tasks such as minification, concatenation, and cache busting.
// gulpfile.js
const gulp = require('gulp');
const cssmin = require('gulp-cssmin');
const rename = require('gulp-rename');

gulp.task('minify-css', function() {
  return gulp.src('./assets/css/*.css')
    .pipe(cssmin())
    .pipe(rename({suffix: '.min'}))
    .pipe(gulp.dest('./priv/static/css'));
});
Conclusion
Efficiently managing static assets in Phoenix applications involves a combination of good organization, regular auditing, and leveraging powerful build tools. By implementing these tips, you can ensure your assets are optimized, your application performs efficiently, and your codebase remains maintainable.
Monitoring Performance with Load Testing
After implementing various optimizations for static assets in your Phoenix application, it's crucial to ensure these changes effectively improve performance under real-world traffic conditions. Load testing offers valuable insights into how your application behaves under stress, identifies potential bottlenecks, and verifies the efficacy of your optimizations. In this section, we'll guide you through using LoadForge to perform comprehensive load testing on your Phoenix application.
Why Load Testing is Essential
Load testing simulates user traffic on your application to measure performance metrics such as response time, throughput, and resource utilization. By stress-testing your application, you can:
- Identify Bottlenecks: Detect slow components or services that may degrade performance under peak traffic.
- Verify Optimization Impact: Ensure that your static asset optimizations genuinely improve load times and user experience.
- Capacity Planning: Gauge how many concurrent users your application can handle before performance deteriorates.
- Continuous Improvement: Facilitate ongoing performance monitoring and optimization, ensuring your application remains robust and responsive as traffic grows.
Setting Up LoadForge for Phoenix
LoadForge is a powerful load testing tool that makes it easy to simulate user load and collect performance data for your Phoenix application. Follow these steps to set up and execute load tests using LoadForge:
1. Create a LoadForge Account
First, sign up for a LoadForge account if you haven't already. Visit LoadForge and complete the registration process.
2. Define Your Test Plan
A well-defined test plan is crucial for effective load testing. Consider the following parameters:
- Test Duration: How long should the test run (e.g., 15 minutes, 1 hour)?
- User Load: How many virtual users will simulate concurrent traffic (e.g., 100, 1000, 10,000)?
- Test Scenarios: Specific routes/endpoints to test (e.g., landing page, API endpoints, static assets).
3. Configure LoadForge Test
Once your test plan is ready, configure your test in LoadForge:
- Create a New Test: Log in to your LoadForge account and navigate to the "Create Test" section.
- Enter Test Details: Provide a name and description for your test.
- Define Target URL: Enter the URL of your Phoenix application.
- Set Load Parameters: Configure the number of virtual users and test duration according to your plan.
- Select Test Scenarios: Specify the endpoints/routes you want to include in the test.
4. Running the Load Test
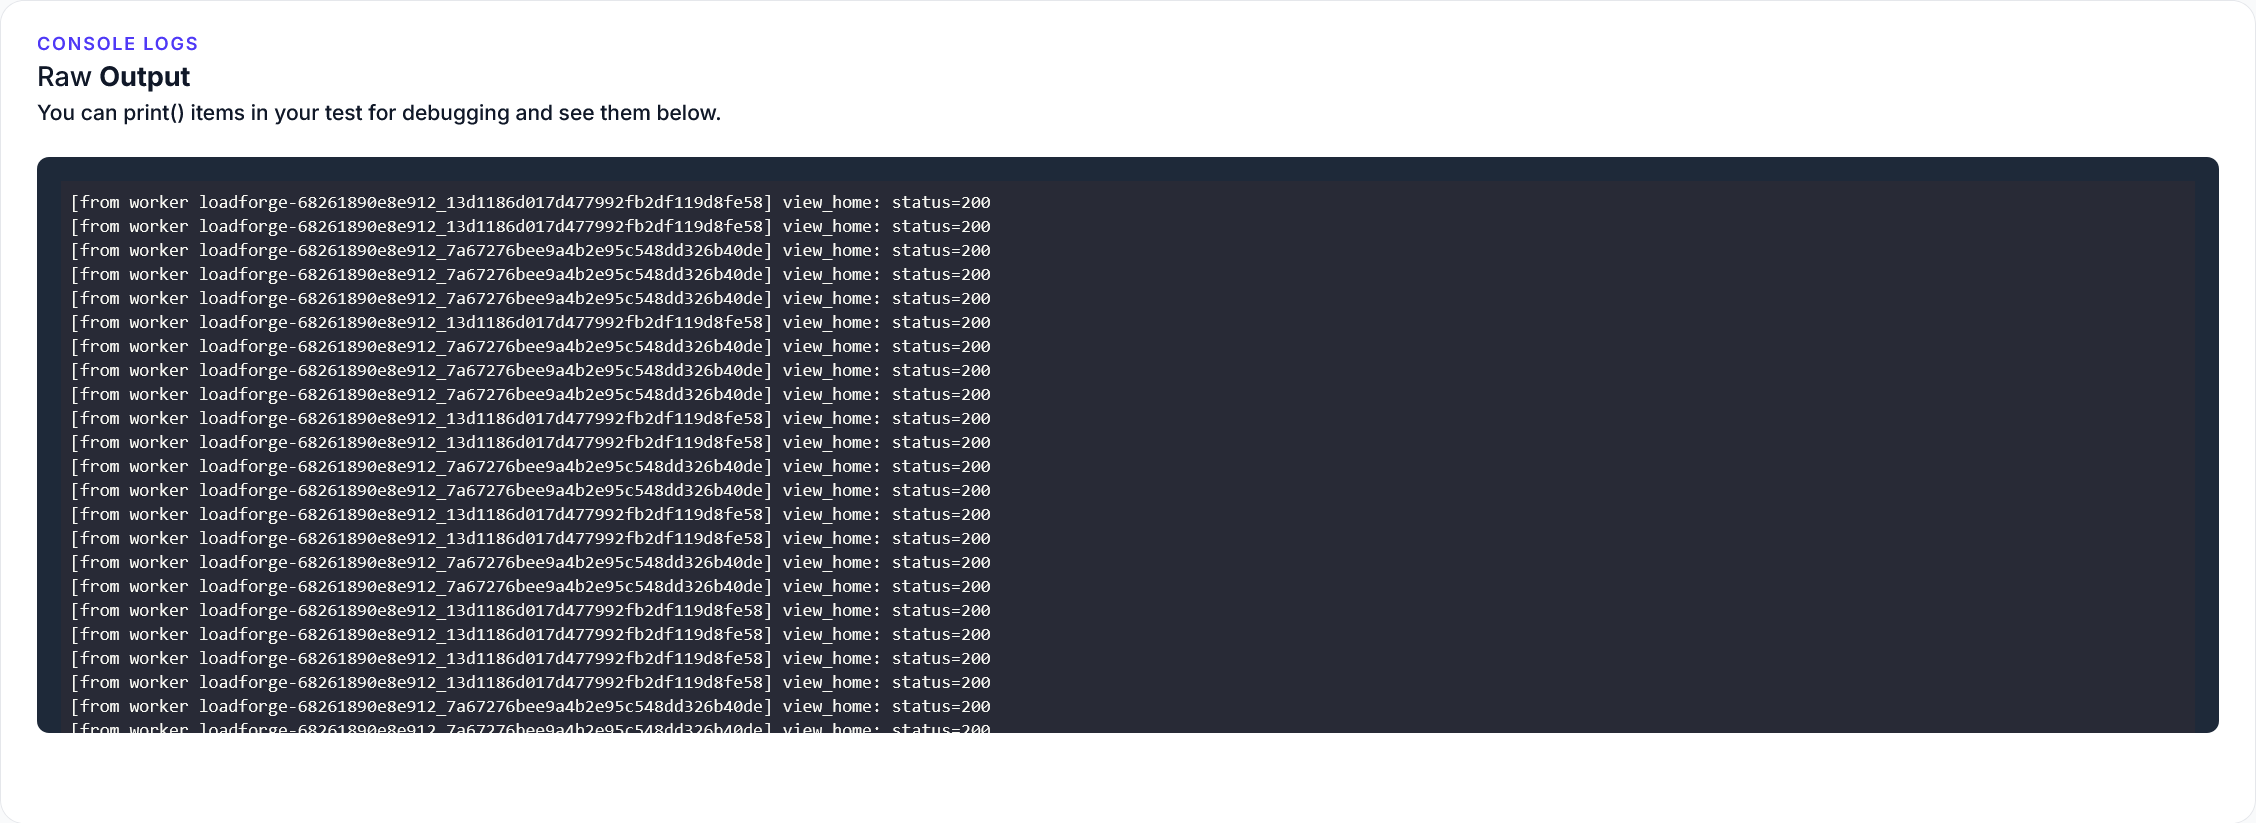
After configuring your test, start the load test by clicking the "Run Test" button. LoadForge will begin simulating traffic to your Phoenix application, and you can monitor the progress in real-time.
Analyzing Load Test Results
Upon completion, LoadForge provides detailed reports and metrics. Focus on the following key performance indicators (KPIs):
- Response Time: Measure the time taken to serve requests.
- Throughput: Number of requests processed per second.
- Error Rate: Percentage of requests resulting in errors.
- Resource Utilization: CPU, memory, and bandwidth usage during the test.
Inspect these metrics to determine the effectiveness of your static asset optimizations. Look for:
- Improved Load Times: Faster page loads and reduced response times for static assets.
- Handling Peak Load: Ability to maintain performance under high concurrent user load.
- Reduced Errors: Lower error rates indicating robust handling of increased traffic.
Example Code for Custom Load Testing Scripts (Optional)
You might want to customize your load test scenarios using LoadForge’s scripting capabilities. Here’s an example of a simple load testing script targeting your Phoenix application's static assets:
// LoadForge scripting example to test static assets
let request = new Request("GET", "https://yourdomain.com/assets/app.js");

let response = http.send(request);
check(response, {
  "Status is 200": (r) => r.status === 200,
  "Response time is below 200ms": (r) => r.time < 200
});

// Add additional requests for other static assets as needed
Continuous Monitoring and Iteration
Load testing should not be a one-time activity. Regularly schedule load tests, especially after making significant changes or optimizations to your application. Continuous monitoring helps identify and address performance regressions early, ensuring that your Phoenix application remains performant and scalable.
Conclusion
By systematically load testing your Phoenix application using LoadForge, you can ensure that your static asset optimizations lead to tangible performance improvements. This ongoing process of testing, analyzing, and iterating will help maintain a high-performance, scalable application that delivers an excellent user experience even under heavy traffic conditions.
Conclusion
Optimizing static assets in Phoenix applications is crucial for achieving superior performance, enhanced user experience, and improved scalability. Throughout this guide, we've delved into various strategies and best practices to help you streamline and optimize your static assets effectively.
Here’s a quick recap of the key points discussed:
-
Understanding Static Assets in Phoenix:
- We started with an overview of what static assets encompass within Phoenix applications, including CSS, JavaScript, images, and fonts.
- We also reviewed how Phoenix handles these assets by default to set the stage for further optimization.
-
Compiling and Minifying Assets:
- We demonstrated how to use tools like Brunch or Webpack for compiling and minifying CSS and JavaScript files.
- The benefits of minification, such as reduced file sizes and faster load times, were emphasized.
-
Leveraging Browser Caching:
- We explained the concept of browser caching and described the process for configuring caching headers in Phoenix.
- Effective caching ensures assets are loaded from the user's browser cache, significantly reducing load times for repeat visitors.
-
Using a Content Delivery Network (CDN):
- We outlined the steps for setting up and configuring a CDN to serve static assets in Phoenix applications.
- Utilizing a CDN helps reduce latency and improves the speed of content delivery globally.
-
Image Optimization Techniques:
- Various techniques and tools for optimizing images were covered, including converting to optimized formats and using compression tools.
- Strategies for responsive design ensure that images are appropriately sized for different devices.
-
Serving Compressed Files:
- We demonstrated how to configure Phoenix to serve compressed files using gzip or Brotli, helping to minimize the transfer size of static assets.
- Compressed assets are faster to download, improving overall performance.
-
Tips for Efficient Asset Management:
- Additional tips for managing static assets efficiently, such as organizing files and performing regular audits, were provided.
- Leveraging automated build tools can further streamline asset management.
-
Monitoring Performance with Load Testing:
- Finally, we discussed how to use LoadForge for load testing Phoenix applications to ensure that the optimizations are effective under high-traffic conditions.
- Regular load testing helps identify performance bottlenecks and maintain high standards.
In summary, optimizing static assets involves multiple facets, from compilation and minification to effective caching, using CDNs, and continuous monitoring. Each step builds upon the last to create a robust, performant application.
By consistently applying these techniques and regularly revisiting your optimization strategies, you can ensure that your Phoenix application remains fast, efficient, and scalable. The landscape of web performance is always evolving, so staying informed on the latest practices and tools is essential.
Remember, the journey of optimization is continuous. Keep monitoring your application's performance, stay up-to-date with new optimization techniques, and utilize tools like LoadForge to ensure your application can handle the demands of your users.
Thank you for following this guide, and happy optimizing!