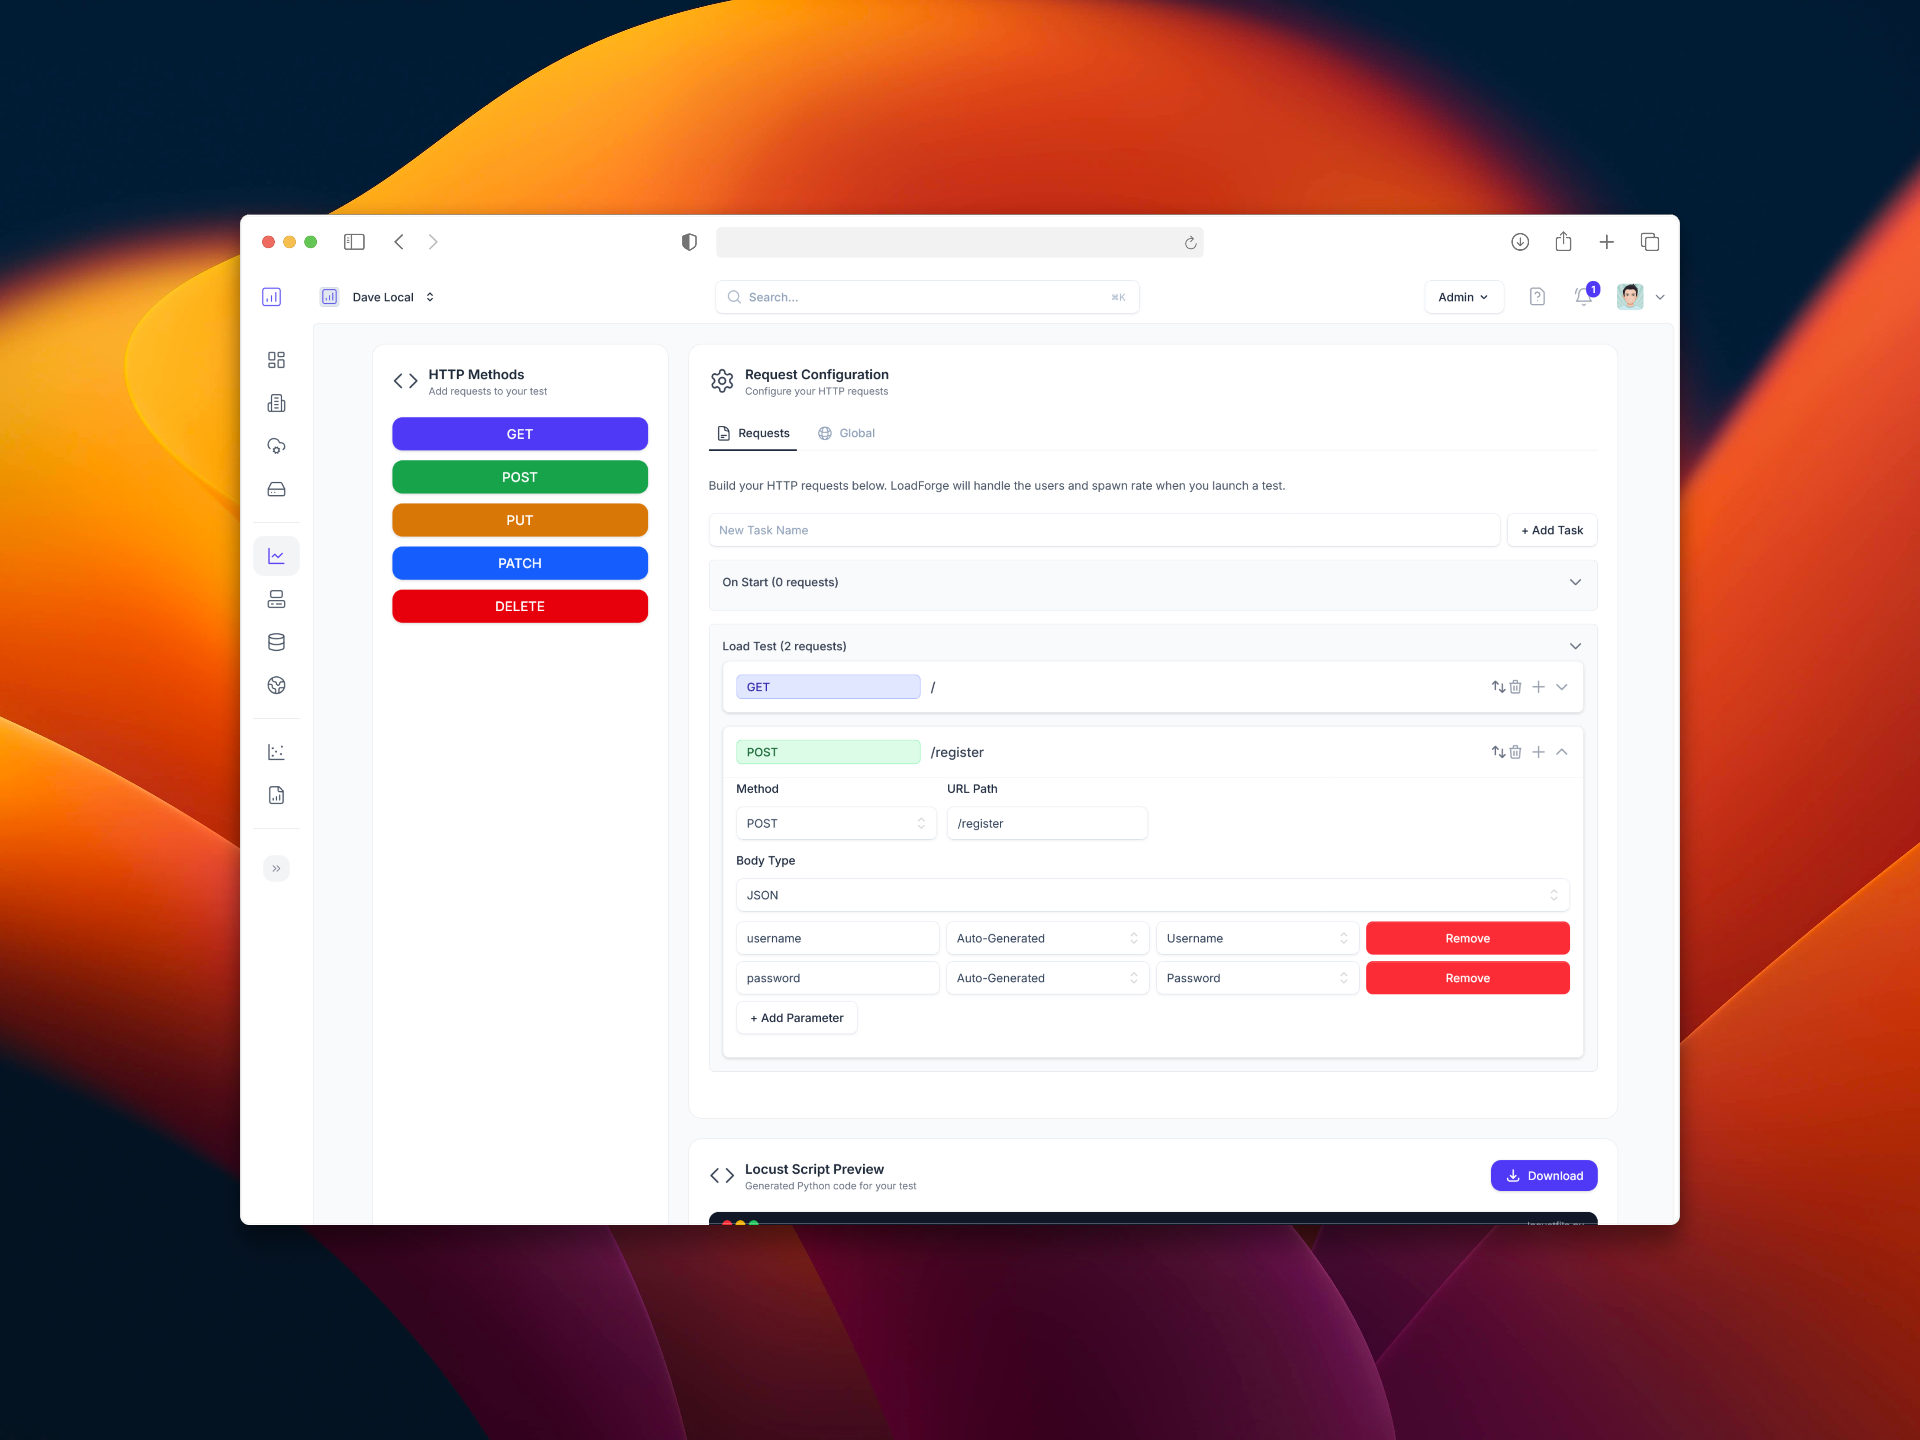
Jira Integration & Graphical Test Builder
We are proud to announce the release of two new features, available immediately. 🚀 Jira Integration: Automate Issue Tracking for...
A collection of guides on load testing, performance testing, and performance optimization from the load test experts at LoadForge.

Explore our guides on optimizing Apache server performance, covering load testing essentials, configuration tips, and best practices to ensure your web applications run efficiently and reliably under heavy traffic.
Explore our guides on Content Delivery Networks (CDNs) to understand how they enhance website performance, improve load times, and ensure reliability by distributing content through strategically located servers worldwide.
Explore our comprehensive guides on optimizing Caddy for better load handling and performance, covering configuration tips, caching strategies, and advanced troubleshooting techniques to ensure your web server runs efficiently under heavy traffic conditions.
Learn how to effectively implement and optimize Cloudflare to enhance your website's performance, security, and reliability through our step-by-step guides and expert insights.
Explore our guides on load testing and optimizing Django applications to enhance performance, scale efficiently, and ensure robust user experiences even under heavy traffic.
Explore our Docker guides to learn how to effectively containerize applications, optimize performance, and conduct load testing to ensure reliability and scalability in your deployments.
Discover best practices for load testing, performance tuning, and optimizing your Drupal site to ensure robust performance, handle traffic spikes, and deliver an exceptional user experience.
Explore our collection of guides on optimizing FastAPI performance, covering best practices for load testing, scaling, and fine-tuning to ensure your web applications remain fast, efficient, and reliable under high demand.
Explore our Fastly guides to optimize your web performance with advanced CDN strategies, enhance caching efficiency, and ensure rapid content delivery to users worldwide.
Explore our HAProxy guides to master the setup, configuration, and optimization of this powerful load balancer for improved application performance and reliability.
Explore our comprehensive guides on Kubernetes to learn how to effectively load test and optimize your containerized applications for peak performance and scalability in orchestration environments.
Explore our collection of guides to master load testing and performance optimization for Laravel applications, ensuring efficient, scalable, and robust web solutions.
Explore our MSSQL guides to optimize database performance, enhance query efficiency, and ensure your systems scale smoothly. Whether you're tuning indexes or monitoring server health, our resources provide practical steps to help you master performance strategies for Microsoft SQL Server environments.
Explore our comprehensive guides on optimizing the performance of MongoDB databases through effective load and performance testing strategies, ensuring scalability and reliability for your applications.
Explore our comprehensive guides on MySQL to enhance performance through efficient database load testing, identify bottlenecks, and implement optimization strategies for faster queries and improved system responsiveness.
Explore our guides on load testing and optimizing NestJS applications, providing insights on enhancing performance, scaling efficiently, and ensuring robust back-end services.
Explore our NextJS guides to master load testing and performance optimization techniques, ensuring your applications run smoothly under pressure and deliver a seamless user experience.
Explore our guides on optimizing Nginx for enhanced performance and reliability, covering configuration tweaks, load balancing, caching strategies, and troubleshooting to ensure your server can handle high traffic with efficiency and stability.
Explore our NoSQL guides to understand how to optimize and load test your NoSQL databases for peak performance, ensuring scalable, high-speed data processing and improved application efficiency.
Explore a diverse range of specialized guides covering advanced performance optimization techniques, niche load testing scenarios, and unique challenges in performance testing that go beyond conventional methodologies, offering valuable insights and solutions for complex testing environments.
Explore our guides on PHP to enhance your skills in load testing, performance tuning, and optimization, ensuring your applications are robust, efficient, and scalable under pressure.
Discover how the Phoenix web framework can be effectively load tested and optimized, ensuring your Elixir applications are robust, responsive, and scalable to meet high user demands.
Explore our guides on PostgreSQL to master performance tuning, optimize queries, and enhance database efficiency for improved system stability and responsiveness.
Explore our PrestaShop guides to learn the ins and outs of optimizing performance, conducting effective load tests, and ensuring your e-commerce platform can handle high traffic smoothly for a seamless shopping experience.
Explore our comprehensive guides on optimizing React applications, covering load testing, performance bottleneck identification, and best practices to enhance user experience and scalability.
Discover how to optimize Redis performance with our comprehensive guides, covering best practices for load testing, efficient data management, and scaling techniques to ensure your Redis implementation delivers fast and reliable results under heavy loads.
Explore our comprehensive guides on load testing, performance testing, and optimization specifically tailored for Ruby on Rails applications to ensure robust, efficient, and scalable web applications.
Explore our comprehensive guides on load and performance testing for Spring applications, focusing on optimizing scalability, responsiveness, and efficiency to ensure your Spring-based systems can handle high-demand environments with ease.
Explore our guides on Strapi to learn how to optimize its performance, conduct effective load testing, and ensure scalability, helping you create a seamless and resilient backend for your applications.
Explore our comprehensive guides on load testing and optimizing Symfony applications, offering insights into performance tuning, managing high traffic, and ensuring your applications are robust, scalable, and efficient.
Explore our comprehensive guides on optimizing Apache Tomcat for peak performance, covering essential topics like configuration, load balancing, and troubleshooting to ensure your web applications run smoothly under high load.
Explore our guides to optimize performance and enhance load testing on WP Engine, ensuring your websites deliver fast, reliable experiences even during high traffic periods.
Unlock peak performance for your WordPress site with our comprehensive guides, offering insights and techniques to optimize speed, reliability, and scalability, ensuring a seamless experience for your users.