Introduction to Caddy Webserver
Caddy is a modern, HTTP/2-enabled web server written in Go, designed with an emphasis on simplicity, security, and extensibility. Its primary goal is to provide a fast and reliable web serving experience with minimal configuration and easy management. Whether you're deploying a single website or a complex web application, Caddy is an excellent choice due to its unique features and robust performance.
Key Features of Caddy Webserver
-
Automatic HTTPS: One of the standout features of Caddy is its automatic HTTPS provisioning. Caddy can automatically obtain and renew TLS certificates through Let's Encrypt, which simplifies the process of securing your web applications.
-
Simplicity and Minimal Configuration: Caddy ships as a single binary with no dependencies. Its configuration is straightforward and human-readable, often allowing you to get up and running with just a few lines of configuration.
-
HTTP/2 and QUIC Support: Caddy supports HTTP/2 out of the box, delivering significant performance improvements by allowing multiple concurrent requests over a single connection. It also supports QUIC, a modern transport layer network protocol that further enhances performance.
-
Extensibility: Designed with extensibility in mind, Caddy allows you to extend its capabilities with plugins. Its modular architecture makes it easy to add custom functionality tailored to your specific needs.
-
Cross-Platform Compatibility: Caddy runs on a multitude of platforms including Linux, Windows, macOS, and various other Unix-like systems. This flexibility allows you to deploy your webserver in a variety of environments with confidence.
-
Integrated Reverse Proxy: Caddy includes a robust, easy-to-configure reverse proxy that can distribute requests across multiple backend servers, making it ideal for load balancing and high-availability setups.
Why Choose Caddy for Hosting Your Web Applications?
1. Security First: With automatic HTTPS and TLS configuration by default, Caddy ensures your web applications are protected with industry-standard encryption without manual configuration.
2. High Performance: The support for HTTP/2 and QUIC ensures that your applications can handle multiple client requests efficiently, reducing latency and improving user experience.
3. Ease of Use: The seamless configuration and minimal setup make Caddy a pleasure to use. Its user-friendly documentation and community support further reduce the learning curve, making it accessible even for developers new to web server management.
4. Flexibility and Extensibility: Whether your needs are simple or highly specific, Caddy's plugin system and powerful configuration syntax allow you to tailor the server to your needs precisely.
5. Stability: Written in Go, Caddy benefits from Go's strong concurrency model and garbage collection, leading to stable and reliable performance under various loads.
Conclusion
Caddy's blend of security, performance, and simplicity makes it a solid choice for developers and businesses seeking a versatile and dependable web server. As you prepare to load test your Caddy webserver using LoadForge, you'll benefit from Caddy's robust feature set and ease of configuration, ensuring that you can focus on optimizing performance and reliability. In the following sections, we'll guide you through setting up Caddy, preparing your environment for load testing, and creating and running locustfiles with LoadForge to simulate realistic traffic and measure your server's performance.
Setting Up Caddy Webserver
Setting up the Caddy webserver is a straightforward process, thanks to its simplicity and powerful automatic HTTPS capabilities. Let's walk through the steps to get your Caddy server up and running quickly.
Step 1: Install Caddy
The first step is to install Caddy on your server. Caddy can be installed using various methods, including package managers, downloading the binary directly, or using Docker.
Installing via Package Manager
On Debian/Ubuntu:
sudo apt update
sudo apt install -y debian-keyring debian-archive-keyring apt-transport-https
curl -1sLf 'https://dl.cloudsmith.io/public/caddy/stable/gpg.key' | sudo apt-key add -
curl -1sLf 'https://dl.cloudsmith.io/public/caddy/stable/debian.deb.txt' | sudo tee /etc/apt/sources.list.d/caddy-stable.list
sudo apt update
sudo apt install caddy
On Fedora/CentOS/RHEL:
dnf install 'dnf-command(config-manager)'
dnf config-manager --add-repo https://dl.cloudsmith.io/public/caddy/stable/rpm.repo
dnf install caddy
Downloading the Binary
Alternatively, you can download the Caddy binary directly from the official website. Choose your platform and preferred options, and follow the on-screen instructions to complete the installation.
Using Docker
If you prefer using Docker, pull the official Caddy image:
docker pull caddy:latest
Run the container:
docker run -d -p 80:80 -p 443:443 --name caddy -v $(pwd)/Caddyfile:/etc/caddy/Caddyfile caddy
Step 2: Configure Caddy
Once Caddy is installed, you'll need to configure it to serve your web applications. Caddy uses a file called Caddyfile for configuration.
Create a Caddyfile
Navigate to your preferred configuration directory and create a Caddyfile:
nano /etc/caddy/Caddyfile
Basic Configuration Example
A simple Caddyfile might look like this:
example.com

root * /var/www/html
file_server

log {
    output file /var/log/caddy/access.log
    format single_field common_log
}
This configuration serves the content from the /var/www/html directory and logs access requests to /var/log/caddy/access.log.
Step 3: Start Caddy
After configuring Caddy, start the Caddy service:
If installed via package manager:
sudo systemctl start caddy
sudo systemctl enable caddy
If using Docker:
docker start caddy
You can check the status of Caddy to ensure it's running:
sudo systemctl status caddy
Step 4: Verify Your Setup
Make sure your server is running and accessible. Open a web browser and navigate to your domain (e.g., http://example.com). You should see the content served from your configured root directory.
curl http://example.com
If everything is set up correctly, you’ll see the HTML content being served by Caddy.
Step 5: Secure Your Site with HTTPS
One of Caddy’s standout features is automatic HTTPS. To enable this, simply ensure your domain in the Caddyfile is valid and accessible over the internet. Caddy automatically fetches and renews SSL certificates for you.
Caddyfile Example with HTTPS
example.com {
    root * /var/www/html
    file_server
    encode gzip

    log {
        output file /var/log/caddy/access.log
        format single_field common_log
    }
}

tls admin@example.com
Summary
With Caddy up and running, you now have a powerful and secure webserver ready to handle your web application's traffic. The next step is to prepare your environment for load testing, ensuring that your Caddy server is properly configured and stable. This will set the stage for accurate and insightful load testing results.
Preparing Your Environment for Load Testing
Before diving into load testing your Caddy webserver with LoadForge, it's crucial to ensure that your environment is properly set up and configured. In this section, we'll cover the key prerequisites needed to make sure your Caddy server is ready for load testing. This involves verifying that your server is stable, your configuration is correct, and any necessary dependencies are in place.
1. Verify Caddy Installation
First and foremost, confirm that Caddy is installed correctly on your server. You can do this by running:
caddy version
The output should display the currently installed version of Caddy. If Caddy is not installed or you face any issues, refer back to the previous section on Setting Up Caddy Webserver for troubleshooting steps.
2. Check Server Stability
A stable environment is critical for meaningful load testing. Ensure your server is stable by monitoring it for a short period (e.g., 24-48 hours) under normal usage conditions. Look for any signs of instability such as crashes, performance degradation, or unusual error logs. Use tools like systemd, journalctl, or Syslog to monitor the Caddy service.
journalctl -u caddy
3. Validate Configuration
Double-check your Caddy configuration for any syntax errors or misconfigurations. The caddy validate command helps ensure that your Caddyfile is correctly formatted and free of errors:
caddy validate --config /etc/caddy/Caddyfile
A successful validation will return no error messages.
4. Ensure Network Accessibility
Load tests will likely send a significant amount of traffic to your server. Confirm that your Caddy server is accessible from outside your network, and ensure there are no firewall rules or security settings that might block incoming traffic. Check server firewall rules using:
sudo ufw status
Adjust as necessary to allow HTTP (port 80) and HTTPS (port 443) traffic.
5. Prepare SSL/TLS Certificates
If your Caddy webserver uses HTTPS, make sure your SSL/TLS certificates are properly set up and not expiring soon. Caddy can automatically manage Let’s Encrypt certificates, but verify they are in place with this command:
caddy trust
6. Backup Your Data
Before executing load tests, ensure you have proper backups of your data and configurations. Load testing might cause unexpected behavior, and having backups ensures you can restore your system to its previous state if needed.
7. Install Python and Locust
Locust is a Python-based tool, and you will need Python installed on your client machine where you plan to run Locust scripts. Install Python and pip if they are not already installed:
sudo apt-get update
sudo apt-get install python3 python3-pip
Then install Locust:
pip3 install locust
8. Configure Load Testing Machine
Ensure that the machine from which you will conduct the load tests is sufficiently powerful to generate the required load. Load testing from a weak machine can lead to skewed results due to client-side resource limitations.
Summary Checklist
With these steps completed, your environment should be well-prepared for conducting load tests on your Caddy webserver using LoadForge. In the next section, we'll cover how to create your Locustfile for defining your load test scenarios.
Creating Your Locustfile
In this section, we'll go through the process of writing a locustfile, which is the script that defines your load test scenarios. Specifically, we'll focus on HTTP and WebSocket requests to comprehensively test the performance of your Caddy webserver. Locustfiles are written in Python, leveraging the capabilities of the Locust load-testing framework. By the end of this section, you'll have a functional locustfile ready to be used with LoadForge.
Step-by-Step Instructions
-
Install Locust: Before creating the locustfile, ensure that Locust is installed in your Python environment. You can install it using pip:
pip install locust
-
Create a New Python File: Open your code editor and create a new Python file named locustfile.py.
-
Import Necessary Libraries: Add the necessary imports for Locust and any additional libraries you may need:
from locust import HttpUser, between, task
from locust.contrib.fasthttp import FastHttpUser
import websocket
-
Define User Behavior Class: Create a class that inherits from HttpUser or FastHttpUser. This class will define the user behavior you want to simulate.
class WebsiteUser(HttpUser):
    wait_time = between(1, 3)

    @task
    def load_homepage(self):
        self.client.get("/")

    @task
    def submit_form(self):
        self.client.post("/submit", {"input_field": "example"})
-
Creating WebSocket Tasks: If your application involves WebSocket connections, you can integrate this into your locustfile.
class WebSocketUser(HttpUser):
    @task
    def connect_ws(self):
        ws = websocket.create_connection("ws://your-caddy-server/websocket")
        ws.send("Hello Server!")
        response = ws.recv()
        ws.close()
-
Combined User Class: If you want to run both HTTP and WebSocket tasks, you can define multiple classes in the same locustfile.
class MyUser(HttpUser):
    wait_time = between(1, 3)

    @task
    def load_homepage(self):
        self.client.get("/")

    @task
    def submit_form(self):
        self.client.post("/submit", {"input_field": "example"})

class MyWebSocketUser(HttpUser):
    @task
    def connect_ws(self):
        ws = websocket.create_connection("ws://your-caddy-server/websocket")
        ws.send("Hello Server!")
        response = ws.recv()
        ws.close()
Sample Locustfile Code
Here's a complete example locustfile, combining both HTTP and WebSocket tests:
from locust import HttpUser, between, task
import websocket

class WebsiteUser(HttpUser):
    wait_time = between(1, 3)

    @task
    def load_homepage(self):
        self.client.get("/")

    @task
    def submit_form(self):
        self.client.post("/submit", {"input_field": "example"})

class WebSocketUser(HttpUser):
    @task
    def connect_ws(self):
        ws = websocket.create_connection("ws://your-caddy-server/websocket")
        ws.send("Hello Server!")
        response = ws.recv()
        ws.close()
Tips for Writing Efficient Locustfiles
- Modularize Your Code: Break down your tasks into functions or methods to keep your locustfile organized and maintainable.
- Parameterize Your Tests: Use variables for endpoint URLs and request data to easily modify and rerun tests.
- Simulate Realistic User Behavior: Use the
wait_time attribute to mimic real user behavior by adding delays between tasks.
By following these steps and examples, you should be able to write a locustfile that adequately tests the performance and scalability of your Caddy webserver. In the next section, you will learn how to execute these load tests on the LoadForge platform.
Sample Locustfile Code
In this section, we will provide a complete example of a locustfile specifically tailored for testing a Caddy webserver. This locustfile will simulate realistic user behavior to ensure your Caddy setup can handle various traffic loads effectively.
Step-by-Step Explanation
- Imports and Setup: Start with importing the necessary modules and setting up the base class for your locustfile.
- Custom User Behavior: Define class methods that simulate realistic user scenarios, including both HTTP and WebSocket requests.
- Task Set Definition: Specify the tasks that Locust users will perform during the test.
- Execution Configuration: Configure the locustfile to include weightings, wait times, and total number of users to simulate.
Below is the breakdown of the locustfile code:
Example Locustfile
from locust import HttpUser, TaskSet, task, between
from locust.contrib.fasthttp import FastHttpUser

class UserBehavior(TaskSet):

    def on_start(self):
        """ on_start is called when a Locust start before any task is scheduled """
        self.login()

    def login(self):
        """Simulate user login"""
        self.client.post("/login", {"username":"test_user", "password":"test_pass"})

    @task(2)
    def index(self):
        """Simulate fetching the home page"""
        self.client.get("/")

    @task(1)
    def about(self):
        """Simulate fetching the about page"""
        self.client.get("/about")

    @task(3)
    def get_data(self):
        """Simulate fetching data via an API endpoint"""
        self.client.get("/api/data")

class WebsiteUser(FastHttpUser):
    tasks = [UserBehavior]
    wait_time = between(1, 3)

    # Class variables for user configuration
    host = "http://your_caddy_server"

# If you have WebSocket testing, you can replace FastHttpUser with WebSocketUser
# and implement WebSocket tasks similarly.
Explanation of Code Components
- Imports: We import
HttpUser, TaskSet, task, and between from the locust library. We also use FastHttpUser for more optimized HTTP requests.
- UserBehavior Class: This class defines the various tasks the simulated users will perform:
on_start(): A setup step that is executed when a user starts, usually used for login.login(): This method simulates a user logging into the system.index(): Simulates the user fetching the home page.about(): Simulates the user fetching the about page.get_data(): Simulates the user fetching data from an API endpoint.
- WebsiteUser Class: This class configures locust to use the
UserBehavior class for tasks, sets the waiting time between tasks, and specifies the host (your Caddy server).
This locustfile provides a balanced approach to simulate various user actions, ensuring diverse traffic patterns. Adjust the weights and functions according to your needs to create a more accurate simulation of user interactions.
Customizing the Locustfile
Feel free to modify the locustfile to better simulate your specific use case. Here are some suggestions:
- Add More Tasks: Simulate additional behavior, such as navigating to more specific pages, submitting forms, or interacting with different API endpoints.
- Parameterize Requests: Use dynamic parameters to simulate more realistic interactions (e.g., different user credentials, query parameters).
- WebSocket Testing: If your Caddy server supports WebSocket, you can replace
FastHttpUser with WebSocketUser and define WebSocket tasks similarly.
Now that you have a complete locustfile template, you are ready to proceed to the next steps in running and analyzing your load tests using LoadForge.
Executing Your Load Tests with LoadForge
In this section, we will walk you through the process of running your load tests on the Caddy webserver using LoadForge. We'll cover everything from configuring your test settings to analyzing the results for valuable performance insights.
1. Setting Up Your LoadForge Account
First, ensure you have a LoadForge account. If you don't already have one, sign up on the LoadForge website. Once you've logged in, you can start setting up your load test.
2. Creating a New Load Test
Navigate to the Load Testing dashboard and click on the "Create New Test" button. You will need to provide the following details:
- Test Name: A descriptive name for your test.
- Description: Brief description of what you're testing.
- Test Type: Select either "HTTP" or "WebSocket" depending on your Caddy configuration.
3. Uploading Your Locustfile
After creating the test, you will need to upload your locustfile. This file contains the behavior scenarios for your load test. Follow these steps:
- Click on the "Upload Locustfile" button.
- Browse your filesystem to find the locustfile you created earlier.
- Upload the file to LoadForge.
4. Configuring Test Settings
Next, configure your test settings. LoadForge provides versatile settings to simulate various load conditions. Key settings include:
- Number of Users: Specify how many concurrent users you want to simulate.
- Spawn Rate: The rate at which new users are spawned.
- Test Duration: How long the test should run.
Example configuration:
Number of Users: 1000
Spawn Rate: 50 users/second
Test Duration: 30 minutes
5. Selecting Test Locations
LoadForge allows you to run tests from multiple geographic locations. This feature is useful for understanding how your Caddy webserver performs under different global conditions.
- Choose Locations: Select one or more locations from which to originate traffic.
- Regional Distribution: If applicable, configure the percentage distribution of traffic from each location.
6. Running the Test
Once your settings are configured, you are ready to start your load test.
- Click the "Run Test" button.
- Confirm your test details and start the test.
LoadForge will now begin simulating traffic according to your locustfile and test settings.
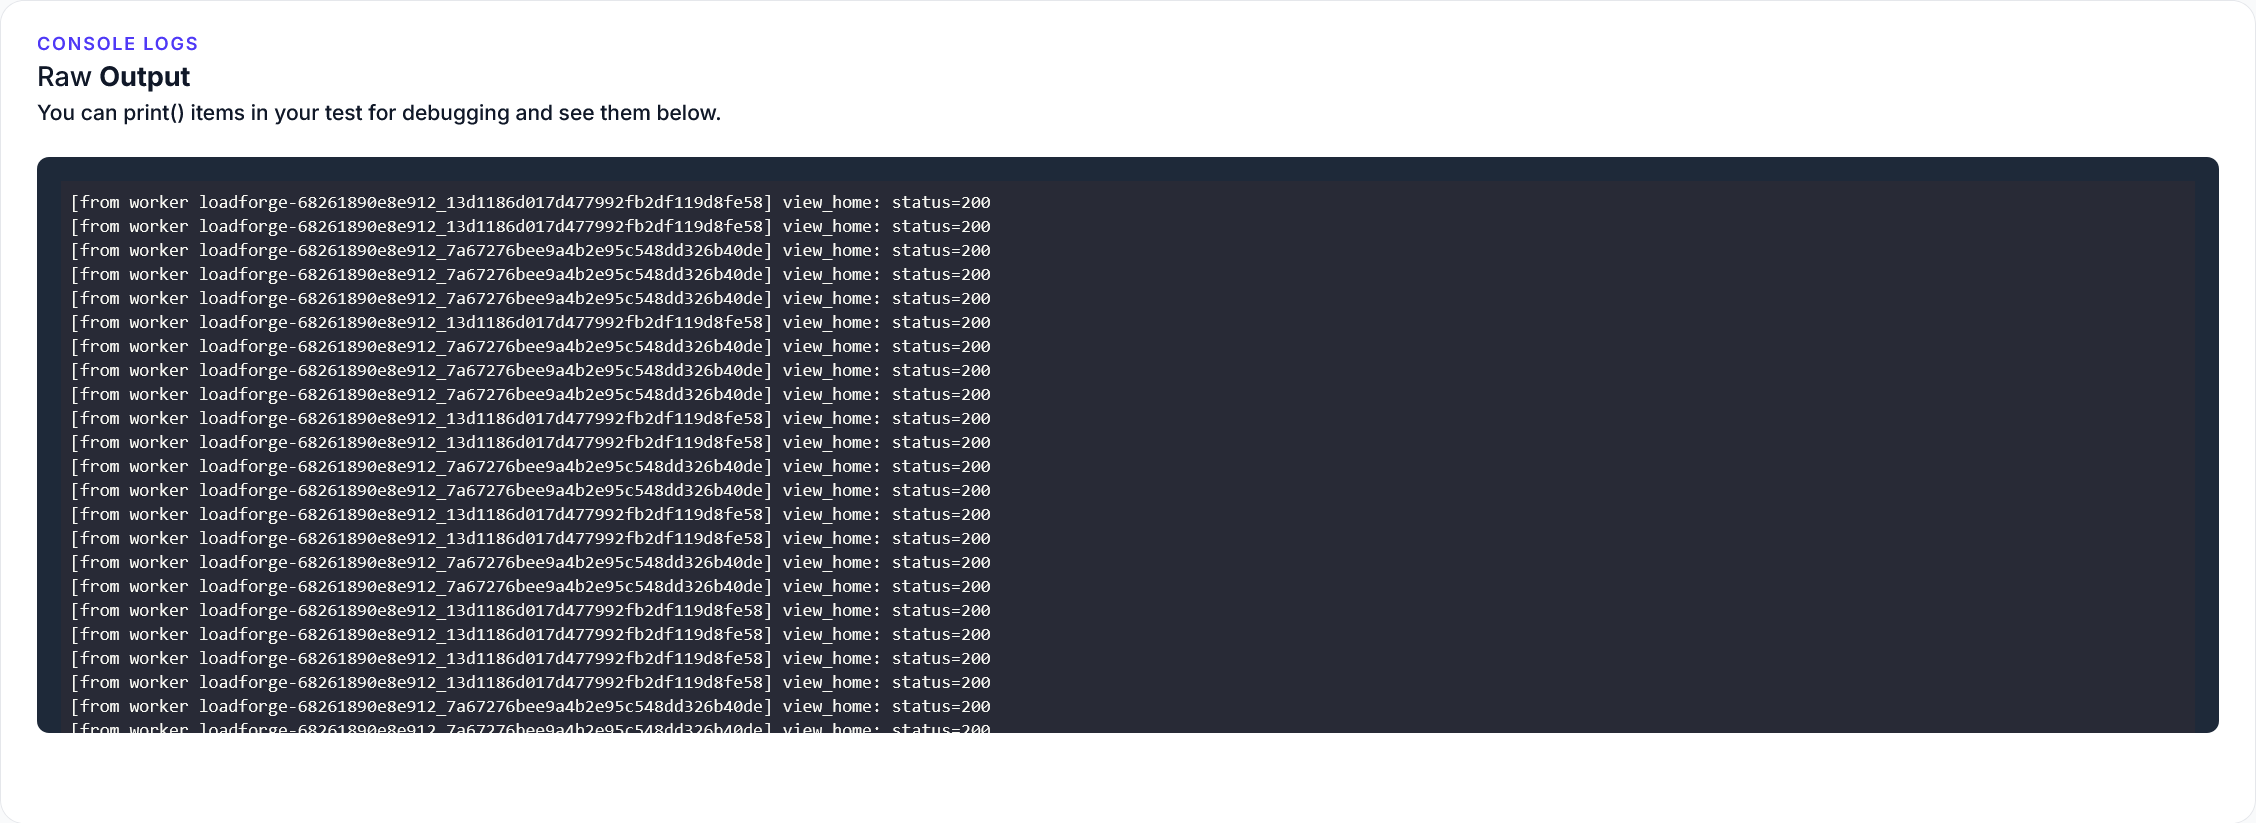
7. Monitoring the Test
While the test is running, you can monitor its progress in real-time. LoadForge provides dashboards displaying key metrics such as:
- Active Users: The current number of active users.
- Requests Per Second (RPS): Throughput rate of requests being processed.
- Response Times: Distribution of response times (average, median, and percentiles).
- Error Rates: Count and type of errors occurring during the test.
8. Analyzing the Results
After the test completes, LoadForge generates a comprehensive report containing detailed results:
- Response Time Distribution: Visual representation of the response times.
- Throughput: Total and average RPS over the test duration.
- Error Analysis: Breakdown of errors encountered, categorized by type and frequency.
- Resource Utilization: Metrics on CPU, memory, and network use during the test.
Conclusion and Next Steps
By now you should be familiar with executing load tests on your Caddy webserver using LoadForge. The insights gathered from these tests are crucial for optimizing your webserver's performance and reliability.
In the following sections, we will discuss how to analyze and interpret the test results and offer tips for optimizing the performance of your Caddy webserver based on your findings.
Analyzing and Interpreting Test Results
Once you've executed your load tests using LoadForge, the critical next step is to analyze and interpret the results to ensure your Caddy webserver can handle the traffic. In this section, we'll explore the key metrics and provide guidelines on how to understand the data generated from your tests.
Key Performance Metrics
To effectively analyze your load testing results, focus on the following key performance metrics:
- Response Times: Measures the time it takes for your server to respond to requests. Look for average, median, and percentile (90th, 95th, 99th) response times to get a comprehensive view.
- Throughput: Indicates the number of requests processed by your server per second. Higher throughput is generally better, as it shows your server can handle more traffic.
- Error Rates: The percentage of failed requests. A low error rate indicates your server is handling the load effectively.
- Concurrent Users: The number of users simulated by your test. See how performance metrics change as the number of concurrent users increases.
Understanding Response Times
Response times are crucial for assessing the performance of your Caddy webserver. Review the following metrics to gain insights:
Evaluating Throughput
Throughput can help determine if your webserver can scale. Here's an example of how throughput might be reported:
Requests per Second: 1500 rps
A higher number means your server processed more requests per second. Compare this with your expected load to assess performance.
Monitoring Error Rates
Interpreting error rates involves looking at the types and frequencies of errors:
- HTTP 4xx Errors: Typically client-side issues.
- HTTP 5xx Errors: Server-side problems that need attention.
For instance:
Error Rate: 2%
- HTTP 500: 1%
- HTTP 502: 0.5%
- HTTP 404: 0.5%
Visualization and Reporting
Most load testing tools, including LoadForge, provide graphical representations of these metrics. Use these visualizations to identify performance trends and potential bottlenecks:

Example Analysis
Here's a simplified report and interpretation from a load test on Caddy:
Concurrent Users: 1000
Average Response Time: 250ms
95th Percentile Response Time: 400ms
Throughput: 1200 rps
Error Rate: 1%
Interpretation:
- The server can handle 1000 concurrent users with an average response time of 250ms.
- The 95th percentile response time is 400ms, showing that most responses are quick even under load.
- An error rate of 1% indicates occasional but acceptably low failures.
Final Thoughts
Analyzing load testing results is vital to ensure your Caddy webserver's robustness and scalability. By thoroughly understanding response times, throughput, and error rates, you can identify areas for improvement and confirm that your server is ready to handle high traffic volumes.
In the next section, we will discuss optimization strategies based on these insights to further enhance your Caddy webserver's performance.
Optimizing Caddy Webserver Performance
Optimizing the performance of your Caddy webserver is crucial for ensuring it handles high traffic loads efficiently. Based on the results of your load tests, here are some tips and best practices to help you get the most out of your Caddy webserver:
1. Use HTTP/2 and TLS
Caddy supports HTTP/2 out of the box, which can significantly increase the efficiency of your webserver by allowing multiple requests over a single connection.
tls you@example.com
http2 {
  max_concurrent_streams 128
}
2. Leverage Caching
Implementing caching can reduce server load and improve response times. Caddy offers various caching mechanisms that you can configure according to your needs.
Example: Enabling FastCGI Cache
route {
  root * /var/www/html
  try_files {path} {path}/ /index.php?{query}
  php_fastcgi unix//run/php/php7.4-fpm.sock {
    cache {
      match_path .*
      ttl 5m
    }
  }
  file_server
}
3. Optimize Static Content Delivery
Ensure that static files are served efficiently by configuring proper headers for caching and compression.
file_server {
  root /var/www/static
  browse
  gzip
}
header / {
  Cache-Control "public, max-age=31536000, immutable"
}
4. Fine-Tune Resource Limits
Adjusting resource limits can help Caddy manage traffic better. This includes setting appropriate limits for file descriptors, processes, and memory usage.
ulimit -n 65536
5. Load Balancing and Reverse Proxy
Distribute incoming traffic across multiple backend servers to achieve higher availability and better performance.
reverse_proxy /api/* {
  to backend1:8080 backend2:8080
  lb_policy round_robin
}
6. Monitor and Analyze
Regularly monitor your Caddy server's performance metrics such as CPU usage, memory usage, and throughput. Tools like Prometheus and Grafana can be integrated to visualize this data.
Example: Prometheus Metrics Export
metrics :2000
7. Enable Compression
Enabling gzip or Brotli compression for your responses can greatly reduce the amount of data being sent over the network, leading to faster load times for clients.
encode gzip brotli
8. Optimize Database Queries
If your Caddy server backend involves database interactions, optimize your queries to reduce the load on your database server. Use indexing, caching, and avoid N+1 queries.
9. Implement Rate Limiting
To protect your server from being overwhelmed by too many requests, implementing rate limiting can be crucial.
route /api/* {
  ratelimit {
    rate 10r/s
    burst 20
  }
  reverse_proxy backend:8080
}
10. Regular Updates and Security Patches
Regularly update Caddy to the latest version to ensure you benefit from performance improvements and security patches.
caddy upgrade
Conclusion
By following these best practices and optimization tips, you can ensure your Caddy webserver is well-prepared to handle the loads identified during your load testing phases. Continuous monitoring and regular updates will help maintain optimal performance over time.
By applying these optimizations, you are well on your way to ensuring your Caddy webserver can handle high traffic efficiently, providing a smoother experience for your users.
Troubleshooting Common Issues
During the process of load testing your Caddy webserver using LoadForge, you may encounter a variety of issues and errors. This section will address some of the most common problems, providing solutions and tips to help you diagnose and resolve these issues effectively.
1. High Latency and Slow Response Times
High latency and slow response times can be caused by several factors, including server configuration, network issues, and hardware limitations. Here are some steps to diagnose and mitigate these problems:
- Check Server Resources: Ensure that your server has adequate CPU, memory, and disk I/O capacity to handle the load. Use tools like
htop and iotop to monitor resource usage.
- Optimize Caddy Configurations: Review and optimize your Caddy configuration file (
Caddyfile). Ensure that caching, compression, and other performance-enhancing directives are properly configured.
- Network Latency: Use tools like
ping and traceroute to check for network latency and potential bottlenecks between your testing location and the server.
Example: Optimizing Caddy Cache
example.com {
    encode gzip
    cache {
        default_max_age 600
    }
    root * /var/www/html
    file_server
}
2. Connection Reset by Peer
This error typically indicates that the client (Locust) was abruptly disconnected by the server. Possible reasons include server overload, software firewalls, or improperly configured connection limits.
- Increase Connection Limits: Ensure that Caddy and your system's networking stack are configured to allow a sufficient number of concurrent connections.
- Monitor Server Logs: Check Caddy server logs for any error messages or clues. Caddy logs can be found in the directory specified in your Caddyfile or by default in
/var/log/caddy.
Example: Increasing Connection Limits in Caddy
example.com {
    tls {
        protocols tls1.2 tls1.3
        curves x25519 p256
    }
    limits {
        body 100MB
        header 1MB
        read_timeout 30s
        write_timeout 30s
    }
    reverse_proxy localhost:8080
}
3. HTTP 5xx Server Errors
HTTP 5xx errors indicate that there is an issue on the server side. Common causes include application crashes, resource exhaustion, or server misconfiguration.
- Application Logs: Check your application's logs for any errors or stack traces that might indicate the root cause of the problem.
- Resource Monitoring: Ensure your server is not running out of memory or other critical resources. Consider using tools like
prometheus and grafana for comprehensive monitoring.
- Configuration Issues: Double-check your Caddyfile and application configuration for any mistakes.
Example: Ensuring Adequate Resources
# Monitor memory and CPU usage
htop

# Monitor disk I/O
iotop

# Check for application logs
tail -f /var/log/myapp.log
4. WebSocket Connection Issues
Load testing WebSocket connections can sometimes lead to issues like connection drops or timeouts. Here are a few tips to handle these issues:
- Idle Timeouts: Ensure that your WebSocket server has appropriate idle timeouts configured to prevent premature disconnections.
- Connection Limits: Verify that your WebSocket server supports the number of concurrent connections specified in your load test.
- Network Stability: WebSocket connections are sensitive to network instability. Ensure that both the client and server have stable network connections during testing.
Example: Configuring WebSocket Timeouts in Caddy
example.com {
    reverse_proxy /ws localhost:8080 {
        transport http {
            versions h2c 1.1
            keepalive 30s
        }
    }
}
5. Locustfile Script Errors
Errors in your Locustfile script can lead to failed load tests or inaccurate results. Be sure to:
- Validate Script Syntax: Use an editor with syntax highlighting and validation to catch errors early.
- Test Your Script: Run your locustfile script locally with a small number of users to ensure it behaves as expected before scaling up.
- Handle Exceptions: Add error handling in your locustfile to manage unexpected scenarios gracefully.
Example: Locustfile with Error Handling
from locust import HttpUser, TaskSet, task, between

class UserBehavior(TaskSet):

    @task
    def load_test(self):
        try:
            self.client.get("/")
        except Exception as e:
            print(f"Request failed: {e}")
            self.environment.runner.quit()

class WebsiteUser(HttpUser):
    tasks = [UserBehavior]
    wait_time = between(1, 5)
Conclusion
By following these troubleshooting tips and techniques, you can effectively diagnose and resolve common issues encountered during load testing of your Caddy webserver. This will help ensure your server is robust and capable of handling the expected traffic. If problems persist, consider consulting the Caddy documentation or reaching out to the LoadForge support team for further assistance.
Conclusion and Next Steps
In this guide, we've covered a comprehensive approach to running load tests on a Caddy webserver using the LoadForge platform. Here's a summary of the key points and some recommendations for your next steps:
Summary of Key Points
-
Introduction to Caddy Webserver
- We explored the unique features of the Caddy webserver, such as automatic HTTPS and easy configuration, which make it an excellent choice for hosting your web applications.
-
Setting Up Caddy Webserver
- You learned how to install and configure Caddy on your server, enabling you to get your webserver running quickly and efficiently.
-
Preparing Your Environment for Load Testing
- Ensured that your Caddy server is properly configured and stable as a prerequisite for load testing to avoid any baseline issues.
-
Creating Your Locustfile
- Provided step-by-step instructions for writing a locustfile to define your load test scenarios, including sample code for HTTP and WebSocket requests.
-
Sample Locustfile Code
- Offered a complete example of a locustfile tailored for testing a Caddy webserver, simulating realistic user behavior.
-
Executing Your Load Tests with LoadForge
- Detailed how to run your load tests using LoadForge, with tips on configuring test settings and analyzing performance insights.
-
Analyzing and Interpreting Test Results
- Explained the process of analyzing data from your load tests, focusing on key metrics like response times, throughput, and error rates.
-
Optimizing Caddy Webserver Performance
- Provided optimization tips and best practices based on your load test results to enhance the performance of your Caddy webserver.
-
Troubleshooting Common Issues
- Discussed common problems you might encounter during load testing and offered solutions and tips for diagnosing issues with your Caddy server.
Recommendations for Next Steps
To ensure ongoing performance and reliability of your Caddy webserver, consider the following next steps:
Continuous Monitoring
- Set up continuous monitoring to keep an eye on your server's health metrics such as CPU usage, memory utilization, and disk I/O. Tools like Prometheus with a Grafana dashboard or a cloud-based monitoring service can be quite effective.
- Log analysis: Regularly analyze your server logs to detect anomalies and potential issues early on. This can include HTTP access logs and Caddy's internal error logs.
Regular Load Testing
- Periodic Load Tests: Schedule regular load tests to ensure your application consistently performs under various levels of user load. This helps in catching performance degradation early.
- Varying Traffic Patterns: Simulate different traffic patterns and load scenarios, including peak traffic periods, to ensure your webserver can handle diverse usage conditions.
Performance Optimization
- Ongoing Performance Tuning: Based on the insights gained from your load tests, continue to fine-tune your server settings and application code. This may include optimizing database queries, caching frequently accessed resources, and using a CDN.
- Configuration Management: Use configuration management tools like Ansible, Chef, or Puppet to automate your server setup processes and ensure consistent configurations across environments.
Collaboration and Documentation
- Team Collaboration: Share the load testing results with your development and QA teams to collaborate on any required fixes or optimizations.
- Documentation: Maintain comprehensive documentation of your load testing strategies, results, and server configurations. This can be useful for future reference and onboarding new team members.
Future Enhancements
- Scaling: Prepare for scaling up your infrastructure based on the capacity planning insights derived from your load tests. This can include scaling vertically (upgrading server resources) or horizontally (adding more servers).
- Security Testing: In addition to performance testing, consider conducting regular security testing to ensure your application is resilient against potential threats.
By following these next steps, you can maintain a robust, high-performing, and reliable web application hosted on your Caddy webserver. Continuing with this disciplined approach to load testing and performance optimization will help you build a resilient application capable of handling increasing user loads.